

 by
by 
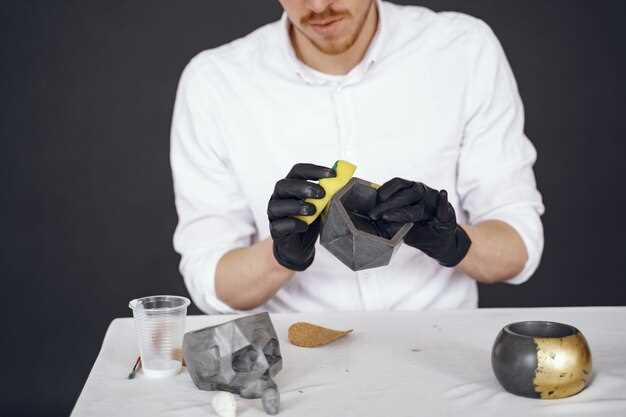
Achieving a glossy finish on resin parts is a crucial aspect of many projects, from model making to industrial applications. The aesthetic appeal of a smooth, shiny surface not only enhances the visual quality but also showcases the craftsmanship involved in the creation of the piece. However, polishing resin can be a challenging task that requires the right techniques and tools to deliver satisfying results.
In this article, we will delve into the essential steps and materials required for polishing resin parts to achieve that coveted glossy finish. From selecting the appropriate type of resin to understanding the process of sanding and buffing, every detail matters in this intricate art. Preparation is key; starting with a well-cured resin piece will set the foundation for a successful polishing endeavor.
We will explore various polishing compounds and tools designed specifically for resin materials. Emphasis will be placed on safety measures, as well as tips and tricks that seasoned professionals recommend for avoiding common pitfalls. By the end of this guide, you will be equipped with the knowledge to transform your resin parts into glossy masterpieces that reflect quality and precision.
Selecting the Right Abrasive Materials for Resin Polishing
When it comes to achieving a glossy finish on resin parts, the choice of abrasive materials plays a crucial role in the polishing process. Selecting the appropriate abrasives requires understanding the characteristics of resin and the desired final result. There are several options available, each with its unique properties and applications.
Sanding Papers are one of the most common abrasive materials used for polishing resin. They are graded based on their coarseness, with lower numbers indicating a rougher texture. Start with a coarser grit, such as 80 or 120, to remove any significant imperfections. Gradually progress to finer grits, such as 400, 800, and up to 2000 or higher, to achieve a smooth, glossy surface. Wet sanding is highly recommended as it minimizes dust and reduces heat buildup, preventing damage to the resin.
Abrasive Pads are another excellent option for polishing resin. These pads are typically made from foam or felt and come in various densities and grits. They are effective for delivering a consistent finish on curved or intricate designs due to their flexibility. Start with a medium-grit pad and work your way to a finer one for optimal results.
Polishing Compounds can also enhance the final finish. These compounds contain abrasive particles suspended in a paste or liquid medium. They are designed to provide a high-gloss finish and can be used with a buffing wheel or by hand. It is essential to choose a compound specifically formulated for plastic or resin materials to avoid damaging the surface.
Diamond Paste is a more advanced option for polishing resin. Consisting of fine diamond particles in a paste form, it is exceptionally effective in achieving a mirror-like finish. Diamond paste is generally used after the initial sanding and should be applied with a felt or microfiber cloth for best results.
In conclusion, the selection of abrasive materials is vital for achieving a glossy finish on resin parts. A combination of sanding papers, abrasive pads, polishing compounds, and diamond paste can provide satisfactory results. Always start with coarser materials and progress to finer options, while being mindful of the properties of the resin to avoid damage. With the right abrasives, you can ensure a professional-level finish on your resin projects.
Step-by-Step Guide to Achieving a High-Gloss Finish
Achieving a high-gloss finish on resin parts requires careful preparation and execution. Follow these steps to ensure a professional-looking result.
Step 1: Prepare Your Work Area
Ensure that your workspace is clean and dust-free. Good ventilation is also essential, as you will be working with resins and solvents that can emit fumes. Lay down protective coverings to safeguard surfaces from scratches and spills.
Step 2: Initial Sanding
Start with coarse sandpaper, typically 120-240 grit, to remove any imperfections. Sand the entire surface evenly, maintaining consistent pressure. This initial sanding is crucial for a smooth base for further polishing.
Step 3: Progressively Sand with Finer Grits
After achieving a uniform surface with coarse sandpaper, switch to finer grits, such as 400, 600, and then 1000. Each step should remove the scratches left by the previous grit. Always sand in a circular motion or use an orbital sander for a consistent finish.
Step 4: Clean the Surface
After sanding, clean the resin part with a soft cloth and isopropyl alcohol to remove any dust and debris. Ensure that the surface is completely dry before proceeding to the polishing stage.
Step 5: Apply a Polishing Compound
Choose a suitable polishing compound designed for resin materials. Apply a small amount to a buffing pad or a clean microfiber cloth. Work the compound into the surface in small circular motions, allowing it to build up a shine.
Step 6: Buff the Surface
After applying the polishing compound, buff the surface with a clean, dry cloth to enhance the gloss. This step may require a bit of elbow grease, but it is essential for achieving that high-gloss finish. You can also use a power buffer for improved efficiency.
Step 7: Final Clean and Inspection
Once you’re satisfied with the gloss level, wipe the part with a soft, lint-free cloth to remove any residual compound. Inspect the surface closely for any remaining imperfections and repeat polishing if necessary.
Step 8: Protect the Finish
To maintain the high-gloss finish, consider applying a clear coat or a protective wax. This layer will help shield the surface from scratches and UV damage, ensuring long-lasting brilliance.
By following these step-by-step instructions, you can achieve a stunning high-gloss finish on your resin parts, enhancing their aesthetic appeal and durability.
Common Mistakes to Avoid When Polishing Resin Parts

Polishing resin parts can enhance their appearance significantly, but several common mistakes can hinder the finishing process. One major error is failing to fully cure the resin before starting any polishing. Inadequately cured resin can lead to soft spots, resulting in an uneven finish and possible damage during polishing.
Another significant mistake is using the wrong type of abrasive. Choosing a grit that is too coarse can scratch the surface rather than polish it, while overly fine grit may not effectively remove imperfections. It is crucial to start with the right grit and gradually move to finer grades for optimal results.
People often neglect to clean the surface before polishing. Dust, fingerprints, or any contaminants can impede the polishing process and affect the final look. Always ensure the resin part is clean and free from debris before applying any polishing compounds.
Improper technique is also a common fault. Rushing through the process or applying excessive pressure can lead to uneven surfaces and potential overheating, which may cause warping or damage. Instead, use a gentle, consistent motion and allow the polishing compound to do the work.
Furthermore, overlooking the choice of polishing compound can result in subpar finishes. Not all compounds are suitable for resin, so it’s essential to select those specifically designed for this material. Using an incompatible product can lead to unwanted chemical reactions, dulling the surface instead of enhancing it.
Finally, many individuals forget to perform a test polish on a small, inconspicuous area. Testing allows you to evaluate how the resin responds to the polishing process before committing to the entire part. Skipping this step can result in irreversible errors that compromise the overall finish.


